Introduction to PyQt5 | Getting started – Technoinc
What is PyQt5?
PyQt is a Python binding of the cross-platform GUI toolkit Qt, implemented as a Python plug-in. PyQt is free software for all OS.
PyQt5 is a comprehensive set of Python bindings for Qt v5. It is implemented as more than 35 extension modules and enables Python to be used as an alternative application development language to C++ on all supported platforms including iOS and Android.
Qt is a set of cross-platform C++ libraries that implement high-level APIs for accessing many aspects of modern desktop and mobile systems. These include location and positioning services, multimedia, NFC and Bluetooth connectivity, a Chromium-based web browser, as well as traditional UI development.
What to do with PyQt:
PyQt has platform-independent abstractions for Graphical User Interfaces (GUI), as well as networking, threads, regular expressions, SQL databases, SVG, OpenGL, XML, and many other powerful features. So we can make different forms, windows base application, game, dataset and many more.
How to Download and Install:
To use pyqt5 you have to python and any editor which supports python language.
If you don’t have python then first download python and any editor. I am using Notepad++.
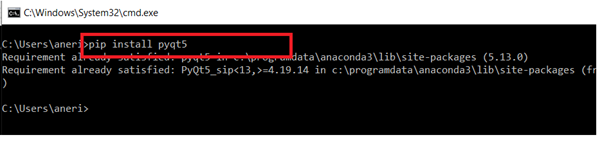
Then open your command prompt and write below line and press enter.
Pip install pyQt5
I have already pyqt on my machine so it will show the Requirement already satisfied.
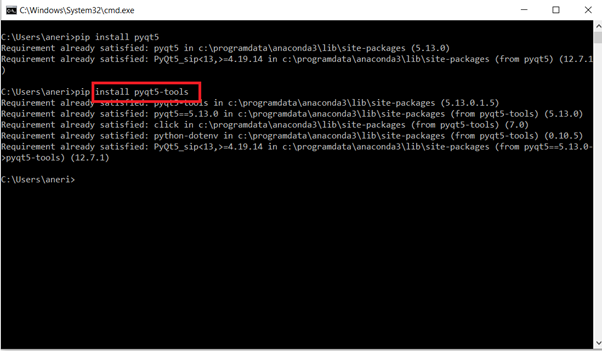
Then we are going to install tools for pyqt. For that write below command in command prompt.
Pip install pyqt5-tools
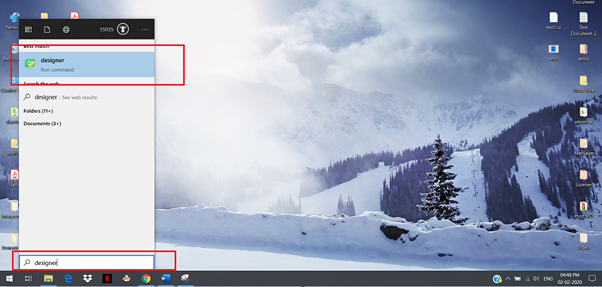
After the successful installation of tools, we open the QtDesigner for our first application.
Simply write designer in the search box and you will find the designer app which is shown in the image.
Open that application and follow the step.
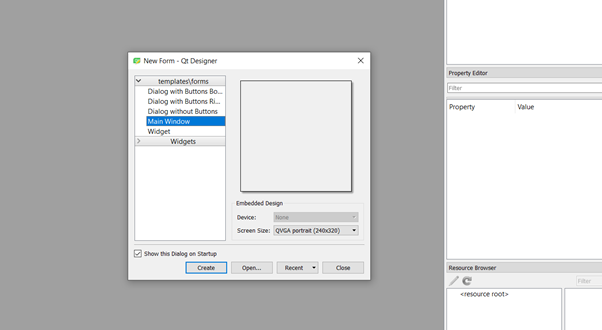
When you open the application you will get a window like this. This is our starting window in which we can select what type of application we have to make and also we can select the screen size.
For now, we are going to use Main Window for this application. So select the Main Window and select the size of the screen.
After that, we get one empty window on our screen which is our work area. We can divide the screen into three-part i.e. left part, work is and right part.
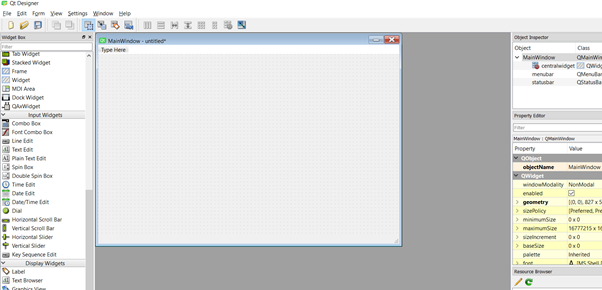
In the left part, you can see the different type of widgets which are drag and drop. We use them in our application as we need. And in the right part, we can find the property area where we can set or edit the properties of widgets which we are going to use in our application like object name, text, color, background color, size, font and etc.
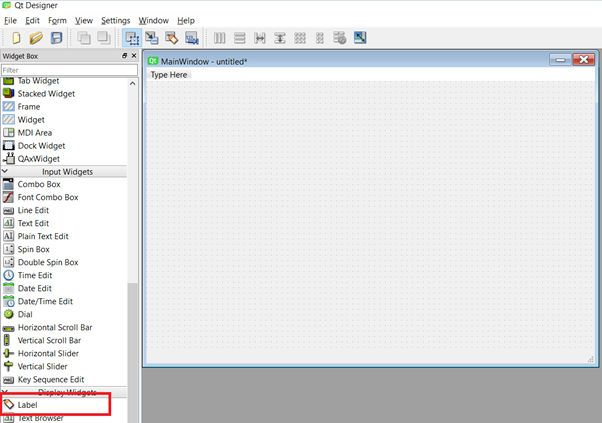
First, just use a label widget for our application. We drag and drop that widget from the widget section to our work area.
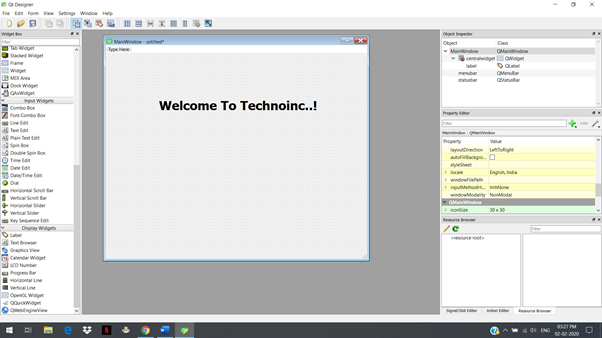
We can see the one Text Label is activated in our work area. We can adjust its size. Colour, text and all other values form the right side of our screen which is the properties area.

Also, we can double click on that text label and change the text. I am going to write Welcome To Technoinc..! and change the font size.
Now we save this file. Before going for saving if you want to see how your application looks like then you can press ctrl+R to show the preview.
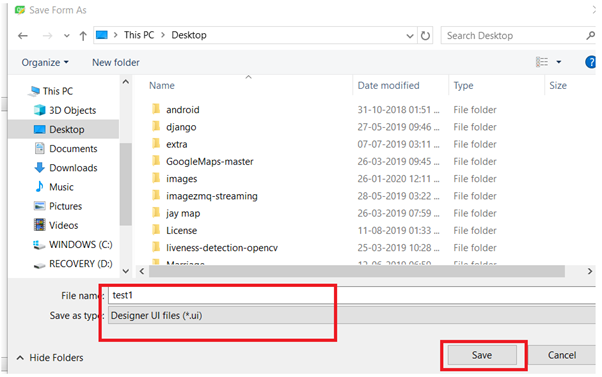
This is .ui file so whenever you save the file it will save with .ui extension. I am going to save my application as test1 on desktop.
The file we save is not executable so first, we going to make it executable. For that open command prompt and got the directory in which you save your file. Then enter the below command.
Pyuic5 -x test1.ui -o test1.py
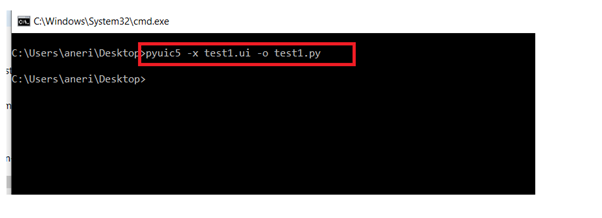
Here -x is used to make it executable and -o is used to open it. Here test1 is my file name and I want to make it test1.py for a run. You have to use your file name.
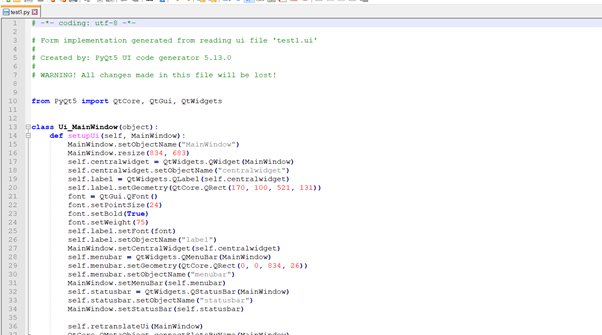
After using that command, you can see that one file creates at your location where you save your .ui file. When you open that file, you can find the whole python code of that application which make in QtDesigner.
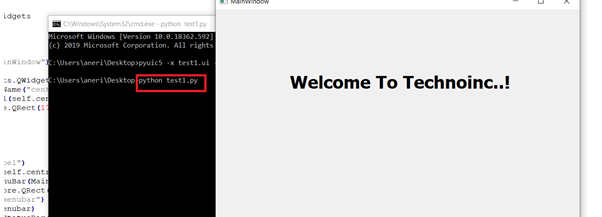
Now we are going to run our application for that open command prompt and go to the location where you save your file and write below command.
Python test1.py
Here you have to use your file name instead of test1.
You can see the new window written with the message which we type in that text field.
Now you can try to make your first application. In the next tutorial, we are going to see how different widgets are useful to make the application and make some forms.